Showing posts with label customization. Show all posts

WCMS Developer Menu (WCMS Part 7)

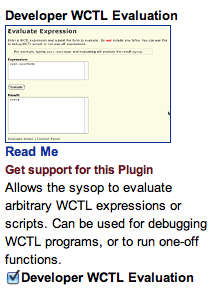
Our latest installment about the WCMS, (Webcrossing Customization Management Suite), is about the developers tools available.

You first must click the link to "Enable developer mode," which will expose an additional pulldown menu below the Localization Manager menu.


Once you've done that, you will see 4 tools available:

  1. Rebuild Include Files
    The WCMS system does its magic by writing a number of special script files which turn on various plugins in various locations in the forum hierarchy.  These files are called "Include" files because, like a server-side include, they load the right script files in the right place.  If something goes wrong, or you accidentally delete one of those include files, this tool will look through all the locations in the forum hierarchy and delete and recreate all those include files. If you have a large, deep hierarchy, it could take some time and possibly impact performance, but if you have this problem you probably won't mind taking your site down temporarily in order to fix it.

  2. Enable "std" Strings
    Each plugin has its own project name. Some older script files from previous versions may use the now-deprecated "std" project for the localization strings.  If you are using one of those older files as a base for your own customization project, you may need to turn this setting on in order to get the localization strings to load for your project.  You only need to worry about this if your file has localization calls using the "std" project, like:

    lang("std", "somestring")
    %% "lang".jsCall("std", "somestring") %%

  3. Enable String Debugging
    If there is a missing localization string sometimes it can be difficult to figure out which plugin project the string is coming out of.  Enabling this setting will add HTML comments after each string call, telling you which project the string is coming from, which string is being called, the language being returned, and information about the user's language settings. This can be really handy when you need it, but be fore-warned, it makes your submit buttons really ugly because the HTML comment will be displayed as part of the submit value and displayed literally on the page.  So you don't want to do this on a production server.

  4. View Log Files
    Admittedly the best way to view log files is on the server via FTP, but if you just need a quick look and aren't in a position to use FTP, this can provide you with that peek you need.  You can choose to see:
    • the last 50 lines of webx.log (showing server status and errors)
    • webxincludes.log (showing which script files are being loaded)
    • the last 50 lines of the logLangErrors file (showing missing localization strings)
    • the most-recently-written JS error file (showing a stack trace of the last SSJS error)


And that's it! To hide this menu, just use the "Disable developer mode" link just below the Developer Menu.


We've got just one more post on the WCMS - next time on how to set granular host permissions to uses the WCMS tools.

Localization Manager (WCMS Part 6)

We've talked about a lot of different things regarding the WCMS - the Webcrossing Customization Management Suite - but so far, all of them have had to do with various flavors of plugins: what they do, how to install them, what kinds of plugins there are.

But the Localization Manager is a little different. It allows you - as the name suggests - to localize, or translate, the user interface into different languages, allowing users to view the site in the language of their choice (if you support more than one).

But the other interesting thing it allows you to do is change the verbiage in the default (US English) interface to account for UK spelling, change terminology like replacing the word "discussions" everywhere with "topics," and reword instructions as you see fit. It's very powerful, and requires no scripting!


As you can see, there are 4 basic parts to the Localization Manager. We'll start with the site charset.


What this does is place a meta tag with the charset in the <HEAD> of your document. You may want to choose ISO-8859-1 for most Latin character sets, or UTF-8 if you are supporting non-Latin languages.

The next control down in the menu is where you add and remove languages, and define what the default language is for users who have not yet made a choice in their preferences.


User preferences:


You can see here that we have added Pig Latin as a supported language, but left English as the default. It's important to note that this doesn't actually provide a translation, but just adds support for that language to your site so you can begin the process. If you are just using US English and only want to change some of the wording, you don't have to visit this page at all.

To provide the translations (or reword the text in English as you see fit), you can use either of the last two options: Edit language strings using web forms or Edit language strings using spreadsheets.

The first option brings up a page like this, where you select the language to edit or translate, and select the plugin whose resource strings you want to edit or translate.


You can either search for a specific string, like "discussions" in our example above, or view them all.


Once you've made the changes you need to make, you can save your changes.

If you have a large number of strings to edit or translate, it may be more convenient to use the Spreadsheet option. What this does is produce a spreadsheet for you to pass off to your translation team. When they've done their work, the finished spreadsheet is run through this page again to apply the translations.


The final option, not in the Localization Manager menu, is to use scripting to create and edit your custom strings file. If you are not afraid of JavaScript, this is perhaps the fastest option. Just put in the strings you need to change, though, or you will not be able to take advantages of future updates.

It's worth noting that the translation machinery will first attempt to deliver a given resource string in the language of the user's choice. If that is missing (due to an error, or an incomplete translation project), it will use the string for the "fallback" language - usually US English, but that can be changed by scripting if necessary.

As you can see, the WCMS Localization Manager is quite flexible, and entirely possible to use without any scripting! Next time we'll talk about some developer tools included with the WCMS.

Extensions (WCMS Part 5)

We've been working our way through the various tools in the WCMS, the Webcrossing Customization Management Suite, which allows you to do customization without scripting.

Today we're going to look at the Extension Manager. Themes are look/feel and layout settings; Components are folder views, message views, etc.; Folder Items are "things that live in a folder," like blogs or calendars; User Items are special bits of user-centric functionality like the Message Center; and Extensions are... well, Extensions are anything that doesn't fit neatly in any of the other buckets. Register Plus (extra user fields to provide extended profiles, plus COPPA support, etc.) is an Extension. Time Since Posting (says "2 days 15 minutes" rather than the exact date posted) is an Extension. The Auto-Responder Filter (allows filtering of out of office replies and other auto-responders) is an extension. There are dozens.

Some extensions must be enabled sitewide. Other extensions can be enabled just in one or more folder hierarchies if that suits your needs better. Extensions are inherited - if you enable Time Since Posting in the Pets folder, the Dogs, Cats, and Fish folders will automatically have it enabled as well.

To enable an extension sitewide, navigate to the Control Panel Extension Manager and use the Choose Extensions option in the Extension Manager pulldown menu. For each extension you want to enable, check the box next to it and submit the form.


To enable an extension in a specific folder, navigate to that folder, click the Edit Folder link, and find the folder-level Extension Manager. Choose the Choose Extensions for this Level option there and you'll see a very similar page, except it will show you if an extension is already enabled there because it is inherited, and it will show you those extensions that can only be enabled in the Control Panel for the top level of the site. Any extensions not inherited, and which don't require enabling at the top level, can be turned on there.


As you can see from the Extension Manager pulldown menu, Extensions each have a settings page, just like other plugins.

That's about all there is about installing Extensions, but the functionality they can add is quite broad and deep.

Next time we'll talk about Localization tools.

Folder Items and User Items (WCMS Part 4)

We've looked at the WCMS (Webcrossing Customization Management Suite) as a whole in the first post in this series, and at some other individual tools in subsequent posts. Now we'll look at the Folder Item Manager and the very similar User Item Manager.

Folder items are, well, items that live in a folder. Folders, discussions, calendars, polls, photo albums, etc. Folders and discussions are built into the Core server, but everything else can be configured by the Folder Item Manager.

User items are plugins with functionality that allows users to do something extra. For example, the Message Center or the Watch Favorite Members plugin. Each user item can be turned off by an individual user in his or her personal preferences.

Once you have installed one or more folder or user items using the Plugins Server, you'll need to use the Folder Item (or User Item) Manager to turn them on. Simply go to the "Enable folder (user) items for this site" page, check the box next to any Folder/User Item you want available on the site, and save the settings. For Folder Items, this allows "add" buttons for those Folder Items to be present in the toolbar for administrators everywhere in the site. For User Items, this allows you to enable them in the folders of your choice in the next step below.


For Folder Items:
However, you need to take an extra step if you want one or more of those Folder Items to be available to regular users (generally those with permissions to add folders, although the requirements can vary from Folder Item to Folder Item). Let's say you want calendars to be available to regular users everywhere in the site, but photo albums only within a certain folder. Since you want calendars available everywhere, you can change that setting at the top level. Go to the Folder Item Manager pulldown menu and select "Choose folder items for this folder." On that page, you can add checkboxes by just those Folder Items you want available "for this folder," which in this case is everywhere. For Photo Albums, which you only want available in a certain folder, navigate to that folder, click the "edit folder" link, and find the folder-level Folder Item Manager, and do the same thing. Now regular users will see "add photo album" links in the toolbar just in that folder, and "add calendar" links in the toolbar everywhere.


For User Items:
Follow the same steps, only the end result is that links to the user tools will automatically be placed in the sidebars or elsewhere within the folders you have specified. Positioning can be changed using the Theme Manager if desired.

There's one more thing you can do with the Folder Item Manager: for the toolbar, determine what order those "add" links should go in.


And of course, there are settings pages for each Folder/User Item you have turned on, available from the Folder/User Item Manager pulldown menu.


As you can see, these tools in the WCMS allow for a lot of flexibility in turning on tools everywhere, just somewhere, and for whom.

Components (WCMS Part 3)

In this post we'll look at the Component Manager, one part of the WCMS, the Webcrossing Customization Management Suite.

A "component" is a large block of page functionality. In this case, it refers to:
  • Top Level View (how the top level of the site looks)
  • Folder View (how items listed in a folder look)
  • Message View (how messages look listed in a discussion
  • Toolbar (how the list of buttons or links looks at the bottom of the page
There are between 2 and 5 options for each of these components, and you must choose one of each. Like everything else in Webcrossing, components are hierarchical. You can use the Tabular Folder View for one folder and the Sortable Folder View for another. First, choose your default Components using the Component Manager in the Control Panel. Then, within each subfolder where you want something other than the default, use the folder level Component Manager (reachable via the Edit Folder page) to choose a different Component. There are some restrictions on putting non "Classic" views inside Classic views, but generally you can arrange things in a nested fashion if necessary.

Most Components have an extensive page of settings you can reach from the Component Manager pulldown menu once you have it enabled.


The Component Manager allows for a lot of customization "bang" for very little effort. Next time, Folder and User Items.

Themes (WCMS Part 2)

Themes are just one part of the entire Webcrossing Customization Management Suite, the WCMS. A half dozen or so themes come with the install package, or you can create your own. Themes are a combination of layout and look/feel settings, and can be applied to the entire site, or to just one or more folder hierarchies, allowing for different areas of your site to look different.


Themes can be applied in two ways: choose one from the "Choose Top-Level Theme" page, or import one. Once a theme is applied, you can change any of the hundreds of theme settings to customize it.

Since themes can be exported or imported, it makes it easy to develop a custom theme on your dev server and then move it to production. You can also export a theme before you start fiddling with it, so if you want to just revert to what you had before, you can easily do that.

Theme settings are hierarchical. If you want your subfolders to be identical except for, say, the color of the text in the banner, you can easily do that. If you want your subfolders to look like entirely different sites, you can do that too. Find the "Choose Folder-Level Theme" from the Theme Manager on the Edit Folder page.

Themes can be either "inside" (the historical banner and footer) or "outside" the banner/footer, or off entirely - which provides a great deal of flexibility.


On the main "Edit Theme Settings" page for either a folder or the entire site, you'll find:
  1. A small mini preview of what your theme looks like
  2. Global settings like font size and face, any HTML to go inside the <head> tags, the global stylesheet, date formatting, buttons and icons, and some basic global colors
  3. Layout settings, which pull together all the layout settings from the other various panels
  4. Color settings, which pulls together all the color settings from the other various panels and some built-in plugins
  5. A page each for the banner, the nav, center, and right columns, and the footer. Each of these pages allows you to set dimensions, colors, etc. as well as determine what "widgets" - for lack of a better word - should be put where. "Widgets" can be:
    • Admin-defined HTML fragments, which can contain WCTL scripting
    • Content blobs from the Content Management plugin
    • Content provided by various plugins, like sidebar polls
    • Other interface widgets provided by the WCMS system such as login/logout links, the time and date, a simple round-robin image rotator, and the like
  6. A page of settings for the WCMS interface widgets
  7. Links to export and import your theme
Themes may not be the best way to go if you have to match an example site exactly to provide a seamless experience for your users going to and from the Webcrossing portion of your site, but if that's not a requirement and you don't have a design team and aren't in a position to do any scripted customization, themes are going to be a great deal of help.

Customization without Scripting (WCMS Part 1)

Since version 5, Webcrossing has had a suite of tools you can use to customize your site without scripting. Collectively these tools are called the WCMS, which is an acronym for Webcrossing Customization Management Suite.


The WCMS allows you to:
  • Choose and customize a theme for your site, or build your own theme.
    • You can customize the layout, including turning on and off left and right columns and setting their widths.
    • You can place widgets or other content in any of 6 blocks on the page.
    • You can customize the theme colors, which carry through the entire site.
  • Choose the particular folder layout, message layout, and toolbar layout you want.
  • Turn on "Folder Item" plugins, which are things that live in a folder.  For example, calendars or blogs.
  • Turn on "User Item" plugins, which provide extra functionality to an individual user.  For example, the Message Center to help people track new messages and bookmarks.
  • Turn on Extension plugins, which provide extra functionality that doesn't fall under any of the previously-mentioned umbrellas. For example, Register Plus for enhanced profiles.
  • Access various localizations tools which allow you to either translate the interface into another language or simply change some terminology.  Like perhaps you prefer to use "topics" to the standard word, "discussions."
  • Access some optional developer tools.
  • Set WCMS permissions for host-level administrators

We have said that WCMS doesn't require any scripting, and that is true. But it doesn't preclude scripting. Administrators can use WCTL in most WCMS fields and control who else has that privilege.

The WCMS is a powerful suite of tools for the non-developer to use to customize their site.  We will talk in more detail about each of these in future posts.